Creating a JavaEngine Autograder
This guide explains the process of configuring and generating an autograder bundle in Quickscope, using the Java Engine for ChalkBox.
Generic Setup
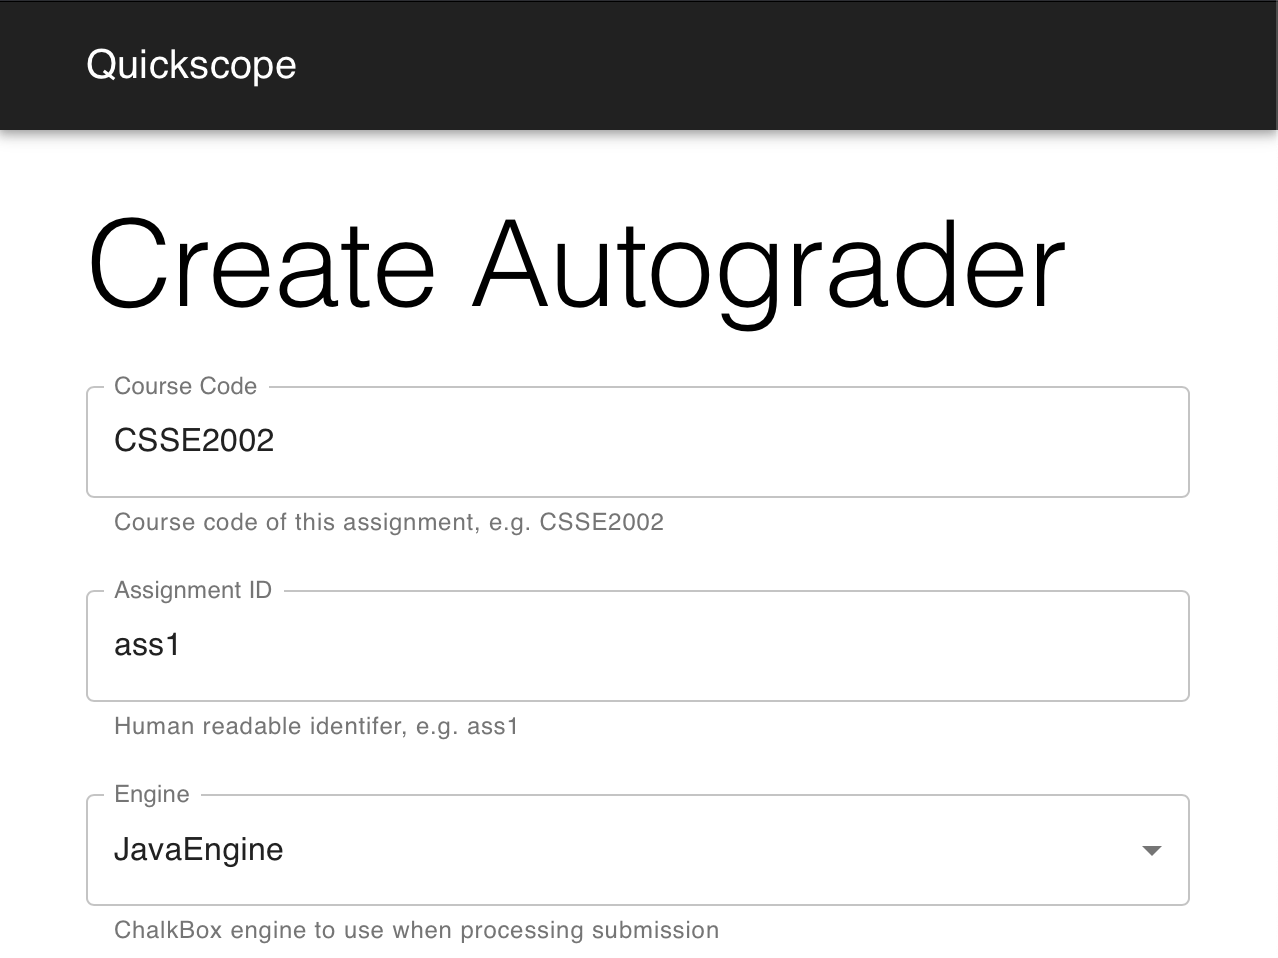
Visit http://quickscope.uqcloud.net and log in with your UQ credentials.
Choose a course code and assignment identifier for the autograder. These will be displayed in the instructor-facing output for debugging purposes each time the autograder runs.
Choose the JavaEngine under the ‘Engine’ dropdown box. A set of engine-specific options will appear below.
Java Engine Configuration
Here, you can select the individual stages to be run as part of the autograder. All stages are optional and can be run separately or together with one or more other stages. Selecting the checkbox next to the name of a stage will enable it, and any stage-specific options will appear below.
Each stage has a weighting, which can be changed by entering a number in the associated text field. This represents the total number of marks, out of 100, allocated to this stage. A submission that scores perfectly in a given stage will receive the number of marks entered here. If a weighting is 0, the stage will still be run, however no marks will be allocated to it.
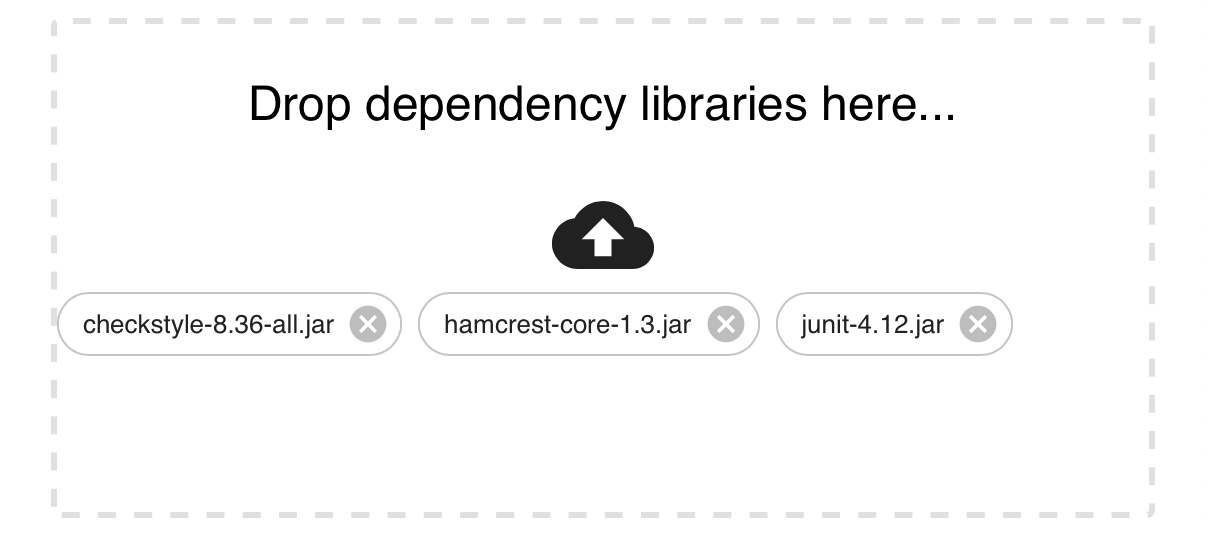
Immediately below the options for each stage are file drop zones for dependency libraries and the correct solution directory, explained below.

Dependencies
Any dependency JARs that are required by the assignment should be added here, for example, JUnit and Hamcrest. If the Checkstyle stage is enabled, the Checkstyle JAR should be added here as well.
Correct Solution
The directory containing the assignment solution should be dragged here. This
directory should contain the two directories src and test, along with any
extra text files provided by course staff for the purposes of testing
I/O-related classes.
For example, if the directory to be added to Quickscope is called correct,
the structure should be:
correct
├── saves
│   └── example.txt
├── src
│   └── tms
│       ├── display
│       │   └── SimpleDisplay.java
│       ├── intersection
│       │   └── Intersection.java
│       ├── route
│       │   ├── Route.java
|       ... more files
└── test
    └── tms
        ├── intersection
        │   └── IntersectionTest.java
        ├── route
        │   ├── RouteTest.java
        ... more files
The correct solution directory should contain all the solution code for the
assignment inside src/, as well as all the tests to be run against the
student submission (if the functionality stage is enabled) in test/.
Test Visibility
To provide immediate feedback to students on submission, a subset of the
uploaded JUnit tests in the test/ directory can be marked as visible at the
time of student submission, rather than the default of only after the grades
have been published/finalised for the assignment.
Immediately visible tests will appear in the results section when a student
makes a submission, along with the mark received for that test and the test
output if it failed.
To mark an individual JUnit test as visible, use the @Deprecated annotation.
For example:
@Test
@Deprecated
public void toStringTest() {
    assertEquals("A", intersection1.toString());
}
Test Weightings
Weightings can be used to allocate more marks to a particular unit test where it is deemed necessary.
The weighting of each individual JUnit test can be modified by adding the
timeout parameter to the @Test annotation. Weightings are integers between
one and nine inclusive, representing a weighting of one and nine times the
regular test weighting respectively.
When including the timeout parameter of a test to specify a weighting, it is
recommended to add a sufficiently large value such that the test does not
actually time out for the given weighting, such as one million milliseconds.
For example, to give a test a weighting of three times the regular weighting:
@Test(timeout = 1000000 + 3)
public void hashCodeTest() {
    assertEquals(a.hashCode(), b.hashCode());
}
Note that the recommended approach to adding timeouts to tests is to use a class-wide timeout rule as shown below.
public class MyTest {
    @Rule
    public Timeout timeout = Timeout.seconds(1);

    ...
Conformance
After enabling the conformance stage by clicking the checkbox under Java Engine Configuration, the violation penalty can be changed by entering a number in the input field. This number represents the number of marks deducted for each instance of non-conformance to the expected public API found in the correct solution. The total of all deductions is capped at the weighting assigned to the stage, meaning students cannot receive a negative mark.
A file drop zone is provided for specifying the expected file structure of a student submission. This should generally be similar to the correct solution directory, however, only the tests classes that are assessable should be present. This is to avoid extra test classes being marked as ‘missing’ in the conformance check.
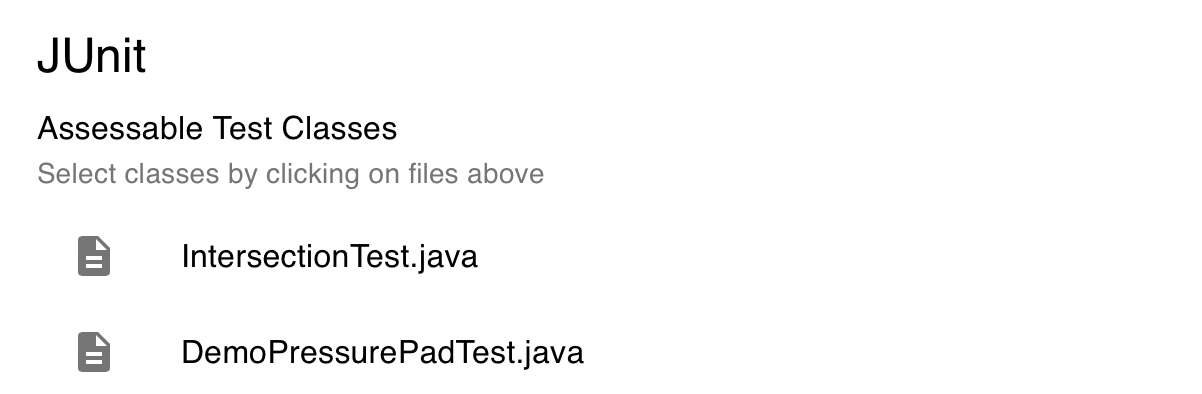
For example, if the directory to be added to Quickscope is called
correct_structure and the assessable test classes are IntersectionTest and
DemoPressurePadTest, the structure should be:
correct_structure
├── saves
│   └── example.txt
├── src
│   └── tms
│       ├── display
│       │   └── SimpleDisplay.java
│       ├── intersection
│       │   └── Intersection.java
│       ├── route
│       │   ├── Route.java
|       ... more source files
└── test
    └── tms
        ├── intersection
        │   └── IntersectionTest.java
        └── sensors
            └── DemoPressurePadTest.java
JUnit
The JUnit classes that are assessable in the assignment should be selected by clicking on the rounded boxes representing files under the “Preview:” section below the correct solution drop zone.
Once a file has been selected, it will appear in the list of Assessable Test Classes. To remove a file from the list, simply click its rounded box again.
Below the list of assessable test classes, there is a file drop zone for
uploading a directory containing a set of faulty solutions to the assignment,
used when assessing submitted JUnit tests. The correct implementation of the
assignment should also be included in this directory, under solution/.
As a suggestion, each subdirectory should be named according to the test class
it is assessing. For example, pp for DemoPressurePadTest.
These subdirectories should act as the src/ directory for each solution,
with packages as immediate subdirectories.
For example, if the directory to be added to Quickscope is called
faulty, the structure should be:
faulty
├── pp_getCongestion_calc
│   ├── README.txt
│   └── tms
│       ├── display
│       │   └── SimpleDisplay.java
│       ├── intersection
│       │   └── Intersection.java
│       ├── route
│       │   ├── Route.java
│       ... more source files
├── ... more faulty solutions
└── solution
     └── tms
         ├── display
         │   └── SimpleDisplay.java
         ├── intersection
         │   └── Intersection.java
         ├── route
         │   ├── Route.java
         ... more source files
Checkstyle
After enabling the Checkstyle stage by clicking the checkbox under Java Engine
Configuration, the violation penalty can be changed by entering a number in the
input field. This number represents the number of marks deducted for each
style violation detected by the Checkstyle tool when run on the src/
directory of the submitted assignment.
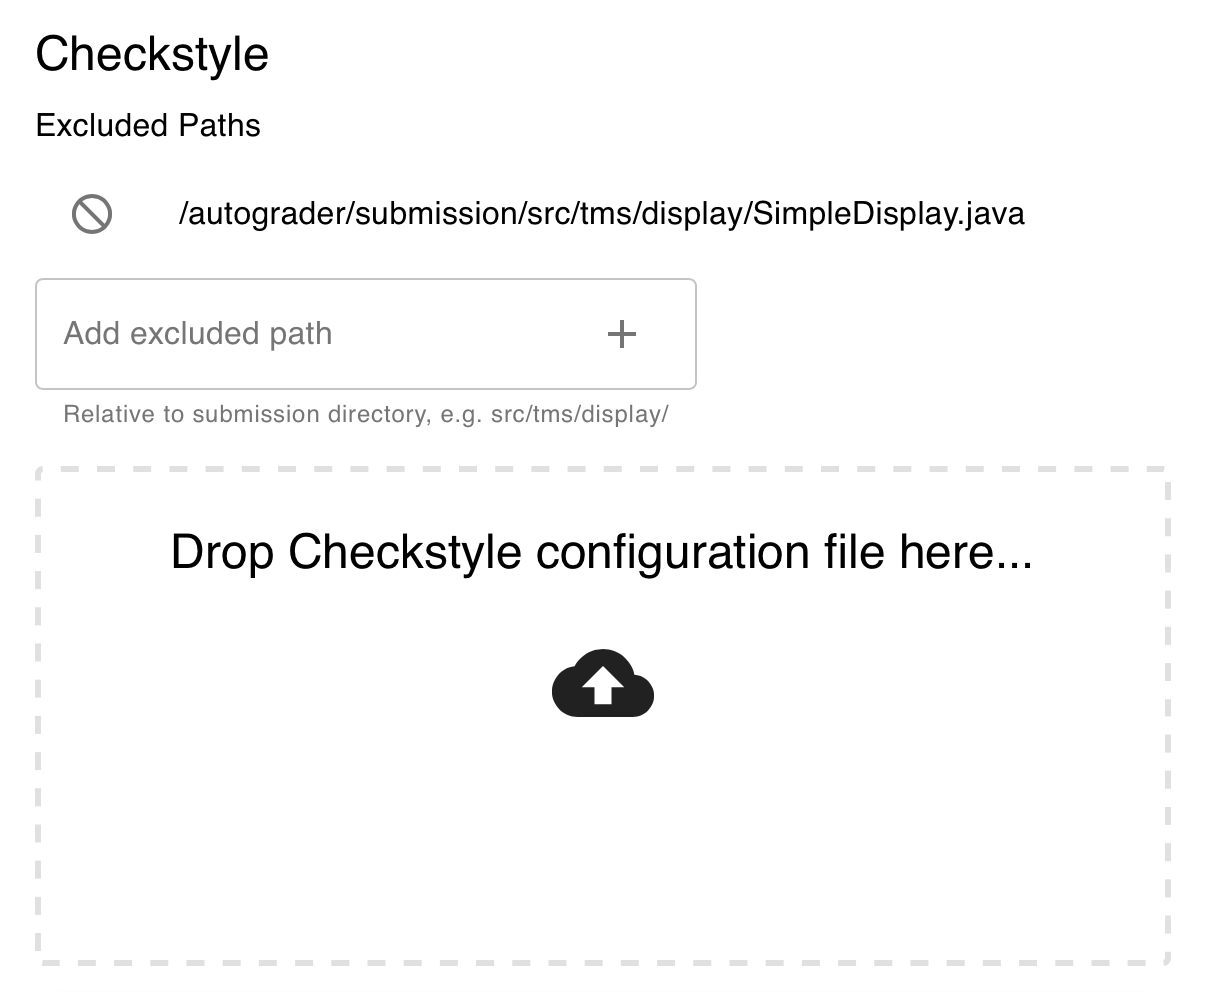
A text input field is provided for specifying paths that should be excluded from being checked for style violations by the Checkstyle tool. Excluded paths can be directories (using a trailing slash) or individual files. If a directory is specified, the entire directory will be ignored when checking for style violations. This functionality can be useful when the assignment contains code provided by course staff that is not compliant with the style guide, for example, a package containing GUI-related code.
To add an excluded path, enter the path in the input field, ensuring the path
is relative to the root directory of the submission, /autograder/submission/.
Then, click the “+” button inside the input field.
The path will display under “Excluded Paths”.
A file drop zone is provided to specify the configuration file to be used
by the Checkstyle tool.
This is an .xml file containing a list of all violation types to detect,
and any associated options.
Generating and Uploading Autograder
Finally, once all stages have been configured, the autograder is ready to be
generated.
Simply click the “Generate Autograder Bundle” button at the bottom of the page,
and a .zip file containing the entire autograder suite will be downloaded
automatically.
This file can then be uploaded to Gradescope.